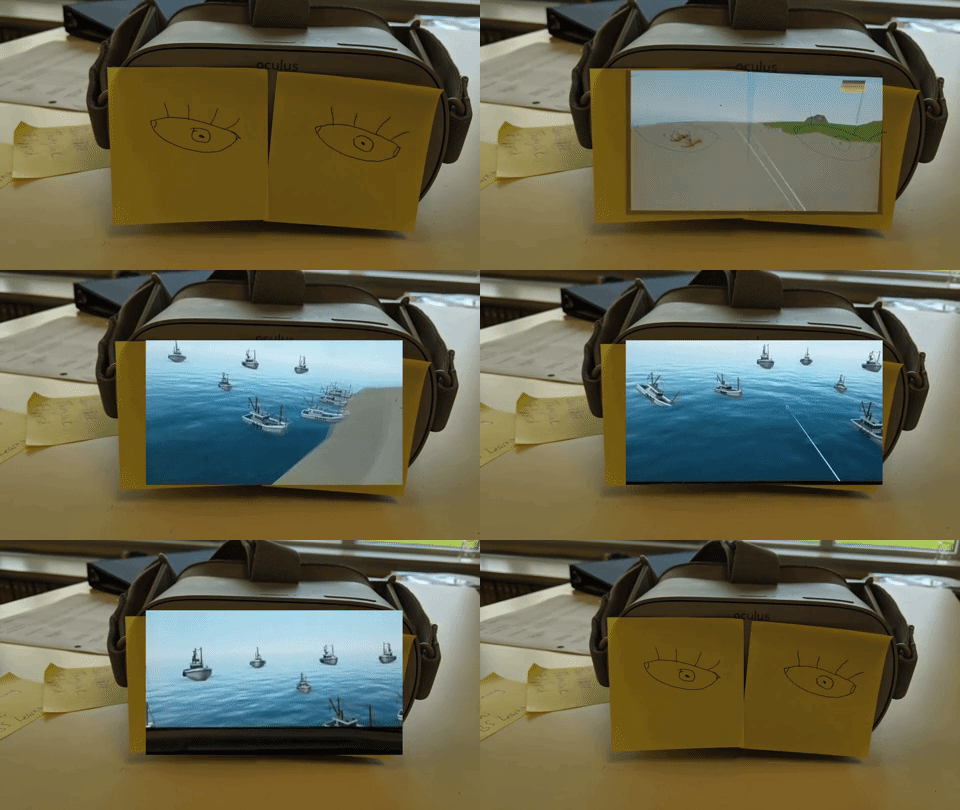
When using virtual reality in my classroom I found it difficult to engage the entire class when only one student was engaged in a VR experience. One thing that’s easy to do is to cast or stream what the user sees in their VR goggles, but it just does not do VR justice. What’s more engaging is to stream both a participant in the experience and the VR as seen here.
I can do this through my NewTek TriCaster Mini HD-4i | All in One Compact Multimedia Production Studio with Integrated Screen” rel=”noopener noreferrer”>Tricaster Mini product but that’s an expensive device with very expensive software. I wanted to be able to do it a little bit easier using my MacBook the problem I had is that I needed to be able to stream live two different sources of video one for the green screen which would be what the user sees in the VR experience in a camera on the participant while they’re using the VR experience.
A lot of people got very excited about this when they saw it on The Tonight Show with Jimmy Fallon as seen here, where he and actress Brie Larson, play Beat Saber and you could see her playing it live. This is exactly what I wanted to do and I had done at with my Tricaster with the Anne Frank experience with one of my students as seen here. But again how do we do this efficiently at a lower cost? Through some research, I found that a lot of online gamers stream to Twitch using a free product called OBS. OBS Studio is a comprehensive open-source package for video recording and live streaming the program supports multiple sources including media files, games, web pages, application Windows, webcam for desktop, and microphone, and more. This is just what I needed so this video here explains how to use OBS to stream the participant and the participants’s experience, in this case, using virtual reality.
What you need:
MacBook
OBS Studio (Download OBS Studio for Mac) this link is for an older version of OBS that I have had more luck with
Webcam or FaceTime Camera
iPad plugged into your Mac as a Camera Source
VR Headset (I use my Oculus Go for this one)
The Setup:
Download OBS Studio
Click + to create a Scene “Green Screen VR”
Click + to add Sources
Select Video Capture Device
Create new “Webcam”
Next to Device select the dropdown to find your webcam, click Ok
Plug your iPad into a USB port of your MacBook (this will allow you to use it as a camera as seen here)
Again Click + to add Sources
Select Video Capture Device
Create new “iPad”
Next to Device select the dropdown to find your iPad, click Ok
You should now see two sources on your Preview Screen, one with a red outline the other with a blue outline.
For the Green Screen
Right-click on the WEBCAM video source and select ‘Filter’.
Click the ‘+’ under the ‘Effects Filters’ section, then select ‘Chroma Key’.
With your Green Screen Set up, adjust the “Similarity” until you get a clear image.
Simply stream this using a projector or TV and it will allow viewers to get a better view allowing for increased dialogue and a shared experience.
While our ELA students are reading the Diary of Anne Frank play which coincides with the World War 2 unit in Social Studies. Using our Oculus Go devices, my students visited the Secret Annex, from the Diary of Anne Frank.
After training half of the students on how to use the Oculus Go headsets, the students then trained their peers to operate the device. We found that there was a relatively low learning curve for successfully navigating the experience.
This immersive experience that brought new life to Anne Frank’s account. Check out one student’s journey… Click here to see a bit of the experience (created using a green screen we can record what the student is seeing live).
We are looking forward more VR experiences like this in our school.
One of my SUBSTITUTION steps in going paperless (see SAMR Model) is to convert meaningful paper-based activities and use them as a digital resources with products like Kami. Kami is a PDF annotation tool.
When I post a PDF in Google Classroom, my students open it in Kami and make a copy for themselves. The next class period I have had them go to Google Drive, locate that file, open it and continue. However, one of my students shared with me that she has bookmarked this page: https://web.kamihq.com/web/viewer.html and she simply goes to recents each time to pull up the previous day’s activities. This may not seem like much but it saves my students a few clicks each time and means one less webpage to load on those slow internet days (yes, they are a real thing). A pretty cool tip!
NOTE: For the past two years I have been a paperless teacher. In my five sections of social studies I distribute activities through Google Classroom. As a result of going paperless, I have saved myself 42 hours of standing at the photocopies each year (yes, literally 42 hours)… that time does not include paper jams. This blog post is a tip I hope will help you in your transition to paperless.
Both Virtual Reality (VR) and Augmented Reality (AR) are emergent technologies primed to make a real impact on learning and training. The excitement around them is great for quickly engaging an audience on a topic or theme, but the challenge for fields focused on learning and training is to leverage these technologies to achieve meaningful objectives.
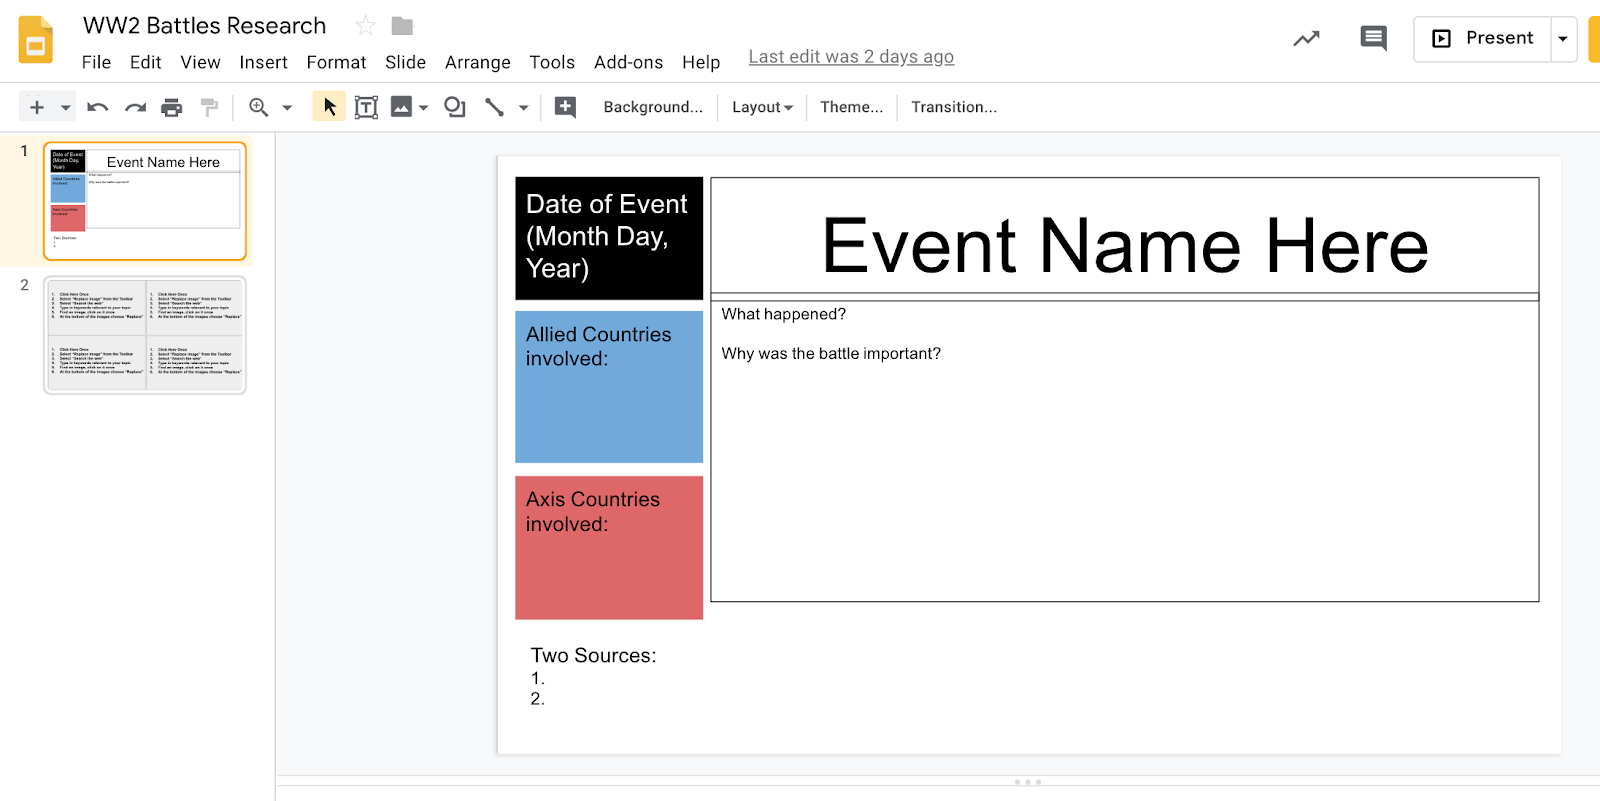
I have been making a deliberate effort to increase exposure to these tools in my own middle school classroom. Most recently, my social studies classes were researching various battles in World War 2. We began with my students completed a pretty standard short research project criteria: Dates, Countries Involved, Significance of the event, etc…
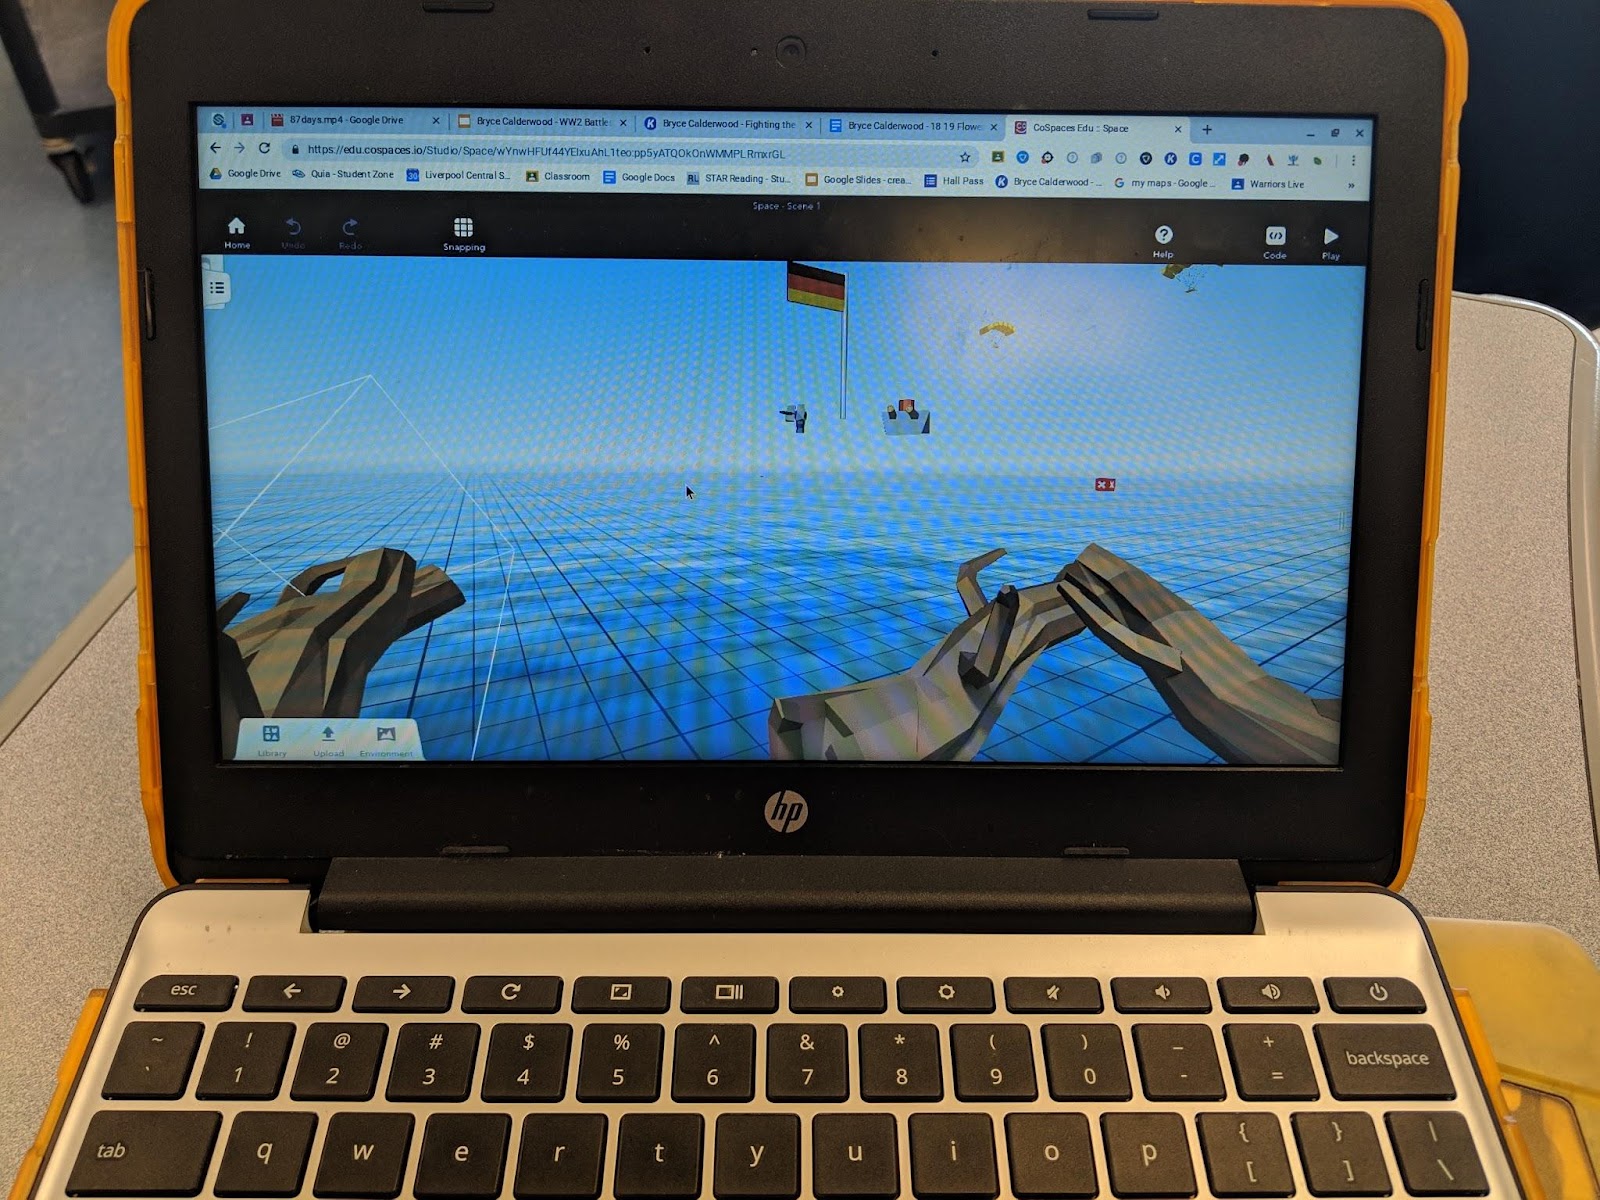
After a day of research, I shared what we can do with their research in CoSpaces EDU. Through CoSpaces EDU, users can include 3D models from Google Poly and code them with the CoBlocks (a block coding program). I asked my students to try to image the battle they studies in VR. After building with their Chromebooks, I was pleased to see diverse interpretations of my direction.
Finally, students who were ready to preview their work, shared it to my teacher account to view in the Oculus Go app.
I am looking forward to seeing what we can create and use with these awesome tools next!
What is a paradigm shift? The simple dictionary definition is that a paradigm shift is an important change that happens when the usual way of thinking about or doing something is replaced by a new and different way. Emergent technology is not in and of itself a paradigm shift. We can, in fact, continue to do things the way we have always done them with familiar workflows.
Emergent technology should inspire a paradigm shift where we change our instructional practice in order to create meaningful learning opportunities.
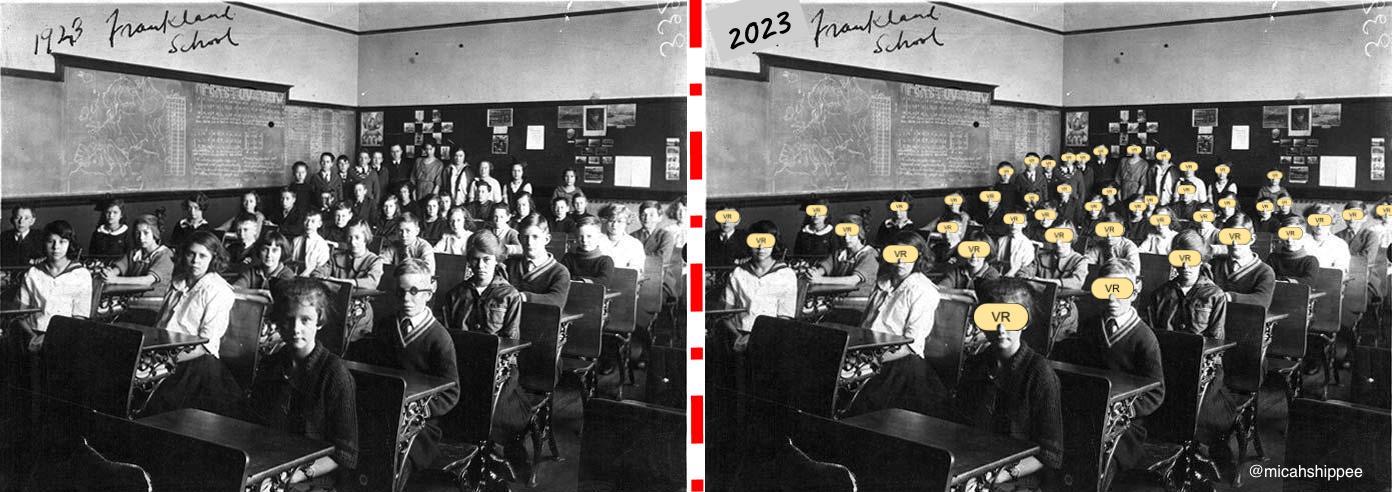
I wonder: How would the classroom of 1923 compare to 2023?
Teaching students to recognize both sides of an argument, and/or have structured conversations centered around class content, regularly finds its place in our classrooms. We teach argumentative essay writing, debate protocols, conversational cues (in all languages), etc… These lessons can be completed through traditional classroom strategies, through podcasting…. and perhaps through texting.
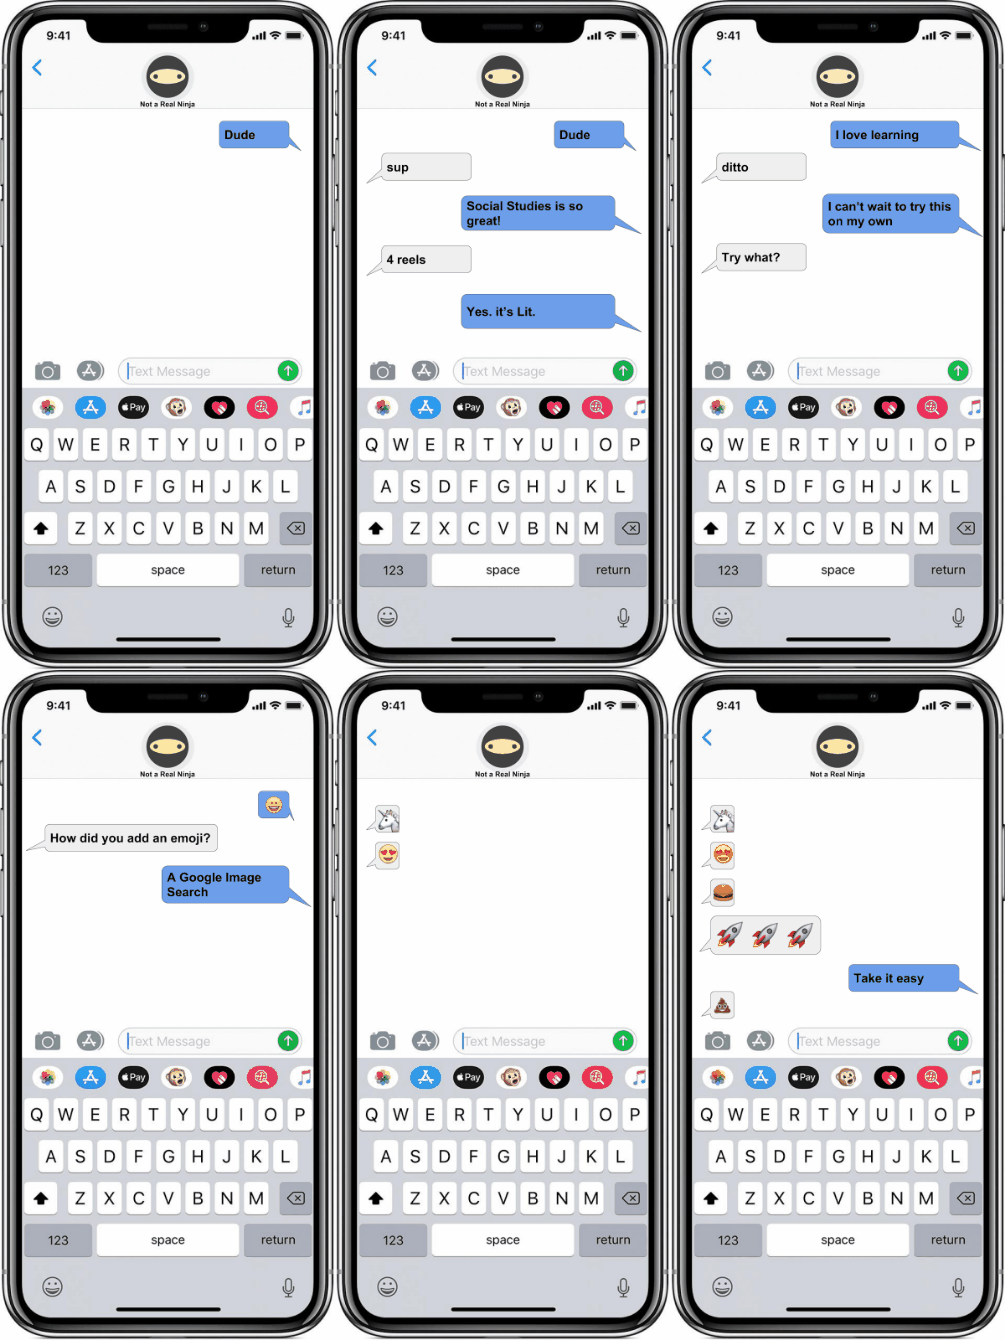
There are a number of websites that let you create a fake text message but I have found many are loaded with questionable (and clickable) advertisements or are just plain blocked in school. To circumvent these roadblocks, I have created a Google Slides deck using an iPhone X frame for inserting text messages in.
The process is relatively easy, you just copy and paste the appropriate shape to keep the conversation going. One of my students called me out on the fact that there is a green iMessage arrow but I made my conversation bubbles blue… thanks Brady, I fixed it for class!.
Students can check their work by previewing the slideshow and clicking the next arrow. One bubble at a time should appear on each slide if they have done it correctly.
Once completed, students can make the slideshow run itself with the following steps in Google Slides:
Click “File”
Select “Publish to the web”
select “auto play” with 2 second transitions
A link will be created that can be shared.
For a bit more of an extension to this activity you can upload the slides to Tall Tweets to create an animated GIF like the one I used.
Our students are texting and communicating via social media on mobile devices quite regularly, perhaps activities like this will provide us with teachable moments in the classroom.
For whatever reason I’ve always thought of podcast is being relatively passe. The idea of audio-only didn’t seem super appealing to my students who are driven by YouTube content. Lately, I have been listening to a podcast from places like Stuff You Should Know and I absolutely love it! So I’ve been trying to think about how this might be relevant for my classroom.
In my social studies classes, we spend a great deal of time working on presentation techniques that are visual. I talk to my students about message design principles to help the viewer engage in the content that the students are trying to present. We look at template-driven applications like Google Slides templates, Slides Carnival, etc… and we also look at video templates like Adobe spark video (which I absolutely love). But all of these examples are really designed to improve visual design skills… designing for audio is equally important.
In an effort to help my students craft a clear dialogue, or writing a message, I decided to try podcasting. Since we were studying FDR and his Fireside Chats it seems like the perfect opportunity to focus on audio message design. I was inspired by the work of my friend Alicia Johal (www.aliciajohal.com) who uses podcasting with her students. Alicia shared her template with me for Designing and planning effective podcast.
Alicia pointed me to Anchor.FM which is a great place for students to create an actual working podcast that they can publish. It even has a monetizing feature which is very effective for our Youtube-Follower generation.
One of the principles I share with students when podcasting was that it’s about 125 words per minute, a 3-5 minute podcast need to have 400 to 500 words in order to fulfill the time requirement. The idea of scriptwriting was not well received, the students appeared very intimidated, in response, I created a very simple video* example of how to get started.
*Please note, this example should be paired with a discussion about correctly citing sources.
To help my students record podcast in a crowded room I found for them what I called recording studios. Our recording studios were actually cardboard boxes used for photocopying. We’ll use these boxes to put are Chromebooks and so that when we recorded we wouldn’t pick up the audio other around the room. Overall are recording studios worked out really well and soothing podcasts were relatively clear concise.
I’m very happy with the way this project came out. Here’s an example of some of the student recordings.
There are times in a school year when we are able to try things out with students with less risk (meaning failure is ok). For me, one of those times is often found at the end of the school year and final exams are finished for the content goals and objectives are complete, it’s at these times I like to try out something new.
Recently, I asked my students to bring whatever devices they had access to from their homes to school if their parents would allow it. Being 7th graders I wasn’t too sure how many of the students would be allowed but nearly 70% came back to school with the devices. So we set out to employ BYOD (bring your own devices) with augmented reality.
I started by asking the students to download several apps including Merge Cubes’ Galactic Explorer and Google Expeditions. I realized employing students own devices in an activity of this nature would bring to the surface very quickly any problems one might have with multiple (different) types of devices and operating systems. My student phones ranged from iPhone 5, 6, 6s, 7, 8 and 10 to HTC, Samsung, Pixels etc… Admittedly there was a lot of troubleshooting going on in my classroom during this augmented reality and virtual reality experience. I found that with my own Pixel to lead with Google Expeditions I needed to go into airplane mode so that my students with various devices could join. I also realized a key problem: that several students did not have an updated AR Kit (iOS) for AR Core (Android) which would allow them to really engage In the augmented reality experiences being offered.
NOTE: Having class-set of common devices (like an iPad cart) can allow you to quickly troubleshoot and set up for more successful engagement.
Merge Cube’s Galactic Explorer
Galactic Explorer by Merge VR
Galactic Explorer by Merge VR allows students to very quickly experience augmented reality in very impressive ways. This is a target based form of augmented reality meaning the Merge Cube needs to be in the sight of the phone’s camera in order to initiate the augmented reality experience. Galactic Explorer is an experience that shows students the solar system. Students can rotate the cubes and rotate their phones to see different celestial bodies from different perspectives and view an information pop-up about the planet they were viewing. I recorded a little bit of the experience my classroom and when I re-watched it I was excited to hear my students say “Oh, wow!” as they saw the different celestial bodies pop-out of the Merge Cube for the very first time. All I could think about was how cool it would be to have student created oral reports in a science class based on the solar system since students in Merge Cube are also able to record their experience so they could have a video of themselves talking about a planet while they hold it in their hand.
My colleague Ray Finney (@FinneyRaymond) posing with the Universe
Google Expeditions
Google Expeditions
Google Expeditions has traditionally been a virtual reality platform that allows teachers to lead students on 360-experiences with content from all over the world. Most recently Google has released an update with Expedition’s that allows for augmented reality views of new content. In this AR experience, teachers can use targets around their classroom to lead students in the exploration of 3D, computer-generated models. All while leveraging one of the most powerful aspects of Google Expeditions… the shared experience. A whole class can have a conversation about what they’re all seeing together.
In my most recent use of Google Expeditions AR experiences, I brought my students outside and connected all of our devices together through a wireless router.* Outside, my students examined Leonardo da Vinci’s machines. I was struck by how the context of our learning really contributed to what they were seeing, meaning that my students were able to see natural resources everywhere trees, dirt, sand, grass, etc… and then look at da Vinci’s three-dimensional computer-generated models that were created Buy DaVinci using this very same natural resources. What struck me is that students were given an in-the-moment experience that was related to their immediate surroundings and allowed for them to retain a sense of mindfulness and awareness of the environment in which the great Renaissance Inventor, Leonardo da Vinci, was able to invent over 500 years ago.
Helping students to understand the power of technology, that many have access to, is a step towards preparing students for their future. While not every student has access yet, we can be assured that costs will come down and power will go up… see Moore’s Law. I believe an ancillary, teachable moment, in classroom experience I have described here, is perseverance… Yes, it needs to be taught. Yes it’s ok if students see us fail and troubleshoot. They need to know adults do have to figure stuff out and sometimes we are not as put together as we may appear 😉
*NOTE: I’m using a wireless router to connect to devices not through the internet but through a Wi-Fi connection. We often use the word Wi-Fi as a synonym for internet when actually Wi-Fi is a communication tool similar to Bluetooth that allows devices to communicate with each other. So using an old router and a phone charger with a brick I’m able to have our Devices connected by Wi-Fi.
During classes, workshops, and talks, I regularly find myself needing to mirror my iPad or iPhone (iOS devices) for demonstration purposes. Mirroring your device means everything you do on your device will be reflected somewhere else: your laptop, a projector, tv, etc… You can wirelessly connect via Airplay, Chromecast, Reflector, or Vysor. Sometimes we find ourselves in places where the WiFi is not super reliable and mirroring our devices wirelessly is just not that good. My personal go-to is a different mirroring process called tethering. To tether your iOS device you will use your USB charger plugged directly into a MacBook.
If iTunes pops up, you can close it immediately. You will need to tell your iOS device to “trust” the computer you have plugged into. Next, you will need to open Quicktime on your MacBook and select “New Movie Recording.”
To enable your iOS device to be mirrored, you will need to select your iPad as the Camera.
This will allow you to mirror your iOS through a stable tethered connection. You can now connect your MacBook to another projection device and display your iOS device. Happy Mirroring!